Get Started
Create a Web Data Connector (WDC) when you want to connect to a web data source from MAPS. A WDC is an HTML page with JavaScript code that connects to web data (for example, by means of a REST API), converts the data to a JSON format, and passes the data to MAPS.
This section will guide you through the process of setting up your development environment and running the sample WDCs in the simulator.
Confirm prerequisites
You’re going to need a couple of things before we get started. Make sure you have the following dependencies installed:
Get the WDC SDK
-
Open a terminal in the directory where you want to download the WDC SDK. Then run the following command to clone the WDC git repository:
git clone https://github.com/evisions/webdataconnector.git -
Change to the directory where you downloaded the repository:
cd webdataconnector
Run the simulator
-
Install dependencies with
npm:npm install --productionNote: You must run the command with administrator or sudo privileges.
-
Start the test web server:
npm start -
Open a browser and navigate to the following URL:
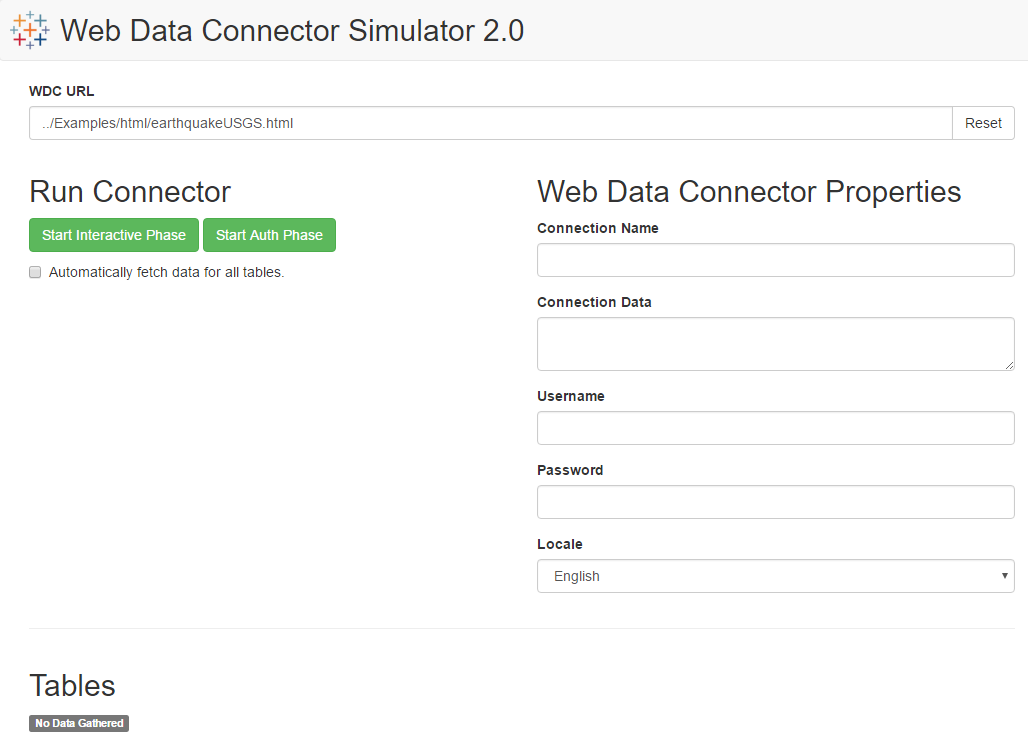
http://localhost:8888/Simulator/index.htmlThe WDC simulator appears.
Note: The npm start command also starts a test proxy server on port 8889 that you can route requests through in order to
circumvent Cross Origin Resource Sharing (CORS) restrictions. For more information, see
Working with CORS.
Try the sample WDCs
-
In the WDC URL field, confirm that the URL is set to the sample USGS Earthquake Data connector:
../Examples/html/earthquakeUSGS.htmlAlternatively, look in the Examples directory for more sample connectors.
-
Click the Start Interactive Phase button to display the user interface for the earthquake WDC.
-
Click the Get Earthquake Data button.
-
Click the Fetch Table Data button to download the data and display it in a table.
Ready to make your own connector? Jump to the WDC Tutorial.